
Running a failing deck belt can affect how well your mower is able to cut your lawn. You keep on mowing, often forgetting to check the condition of your belt until you notice your lawn doesn’t look as good as it usually does after mowing.
A mower deck belt can become worn over time and be ineffective when turning your blades. Because you don’t change your deck belt frequently, it can be tough to remember what steps you need to take in order to change it.
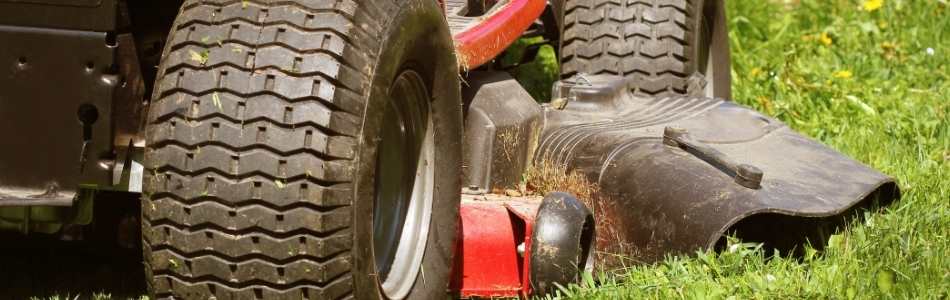
Changing Belts on a Push and Riding Craftsman Mower
There are many models of Craftsman mowers on the market today. The steps that I am going to go through should be a guide to replacing a deck belt on most Craftsman mowers.
If you run into any problems, consult the operator’s manual specific to your model mower.
You will need to buy the correct deck belt. You may still be able to read the part number on your belt. If not, you can look it up using your model number online at SearsPartsDirect.com.
A local auto parts store may be able to match up your belt with one they have on hand, but from experience, these belts do not perform as well or last as long as the OEM (Original Equipment Manufacturer) belts. Running the wrong type of belt can become a safety problem.

This post may include affiliate links. Purchases made through these links may provide a commission for us, at no extra cost to you. As an Amazon Associate, we earn from qualifying purchases.
Follow all safety instructions provided in your equipment operator’s manual before diagnosing, repairing, or operating. Consult a professional if you don’t have the skills, or knowledge or are not in the condition to perform the repair safely.
Change the Deck Belt on a Craftsman Push Lawn Mower
Here are the steps to replacing the deck drive belt on your Craftsman push mower.
Step 1: Gather the Proper Tools
It’s good to start your mower deck belt replacement with all the tools you need so you’re not running around searching for tools in the middle of these steps.
To change your belt, you’ll need:
- A screwdriver set
- A ratchet or socket wrench set
- A block of wood
- Work gloves
- Safety glasses
Step 2: Locate a Workstation and Make Sure Your Craftsman is Not Hot
Now that you have all of your tools together, find a good place to work on your Craftsman. I prefer to work on push mowers when they are off the ground and on my workbench.
It is just easier to work on the mower when it is higher off the ground and it saves my back from all of the bending and twisting.
Make sure you secure your mower when using a workbench so it does not move and potentially fall off the bench. If a workbench or raised work surface is not available, it is fine to work on your push mower while it is on the ground.
You’re not going to want to work around a hot engine so if you were running your mower recently, you’ll want to let it sit and cool for about 10-15 minutes to avoid burns and fumes.
Step 3: Prep the Spark Plug and Fuel Tank on Your Craftsman
Gas Powered Push Mower: Unplug the spark plug boot and seal your fuel tank so gas doesn’t seep around the cap area when you tip it upwards to change your Craftsman belt.
To seal the fuel tank, you can either use packaging tape to tape around the cap and the vent hole on the cap. The other method is using a thin sandwich bag.
With your fuel cap removed, lay the sandwich bag over the opening of the fuel tank and then tighten the cap onto the fuel tank and bag.
Battery-Operated Push Mower: Remove the battery so you don’t accidentally turn on the mower.
Step 4: Tilt and Secure Your Craftsman Push Mower
Now that you have taken safety precautions by removing the spark plug or battery you will want to tilt your mower back on its handle.
Secure the mower handle by strapping it down to the workstation or using something soft and heavy to keep your mower from shifting when working on it.
Use the block of wood to wedge between the blade and the mower deck. This is just an extra step, for safety, to keep the blade from moving and potentially hurting you while you loosen and remove the blade.
Step 5: Remove the Blade, Blade Support, and Blade Bolt from Your Craftsman
With your work glove on, firmly place your hand on the blade where the wooden block wedges it. Loosen the blade bolt and remove it from the crankshaft along with the blade and blade support.
Step 6: Remove the Bottom Drive Cover and Debris Shield from Your Craftsman
Before we can get to the drive belt, there are a few more components we’ll need to remove first, both underneath and on top of the lawn mower.
Remove the bottom drive cover screws and debris shield bolts and remove the shield. Gently twist and remove it from the crankshaft pulley.
Step 7: Remove the Craftsman Crankshaft Pulley & One End of the Belt
Remove one end of the drive belt by pulling the belt off the crankshaft pulley and then removing the crankshaft pulley.
Step 8: Remove the Craftsman Drive Cover & the Other End of the Belt
Now that you’ve removed one end of the belt, you will need to remove the other end. To do this, unstrap or release the lawn mower handle and place it in the upright position. Remove the mounting screws from the top of your drive cover using a screwdriver.
If your Craftsman lawn mower has a height adjustment lever, you’ll need to release it before you can pull the drive cover off. Remove the cover to access the drive belt.
You’ll need to unhook the keeper that secures the belt to the top of the transmission. Remove the old belt and place the new belt over the transmission pulley and through the opening of the deck.
Step 9: Install Belt, Cover, Shield and Pulley by Performing Steps Do in Reverse Order
You will now need to perform all of the steps in reverse order to install your belt and replace the parts that you previously removed. Start by reattaching the belt keeper to the new drive belt on top of the drive pulley on the transmission.
Replace the drive cover with us, reconnect the height adjuster lever if you have one on your mower, and use the screws to attach it in place. Next, tip the lawn mower back and secure the handle as you did before.
Now that you have access to the bottom of the deck again, you will need to wrap the new drive belt around the crankshaft end and replace the crankshaft pulley.
There are indentations on the pulley that need to be aligned when you reinstall it. Roll the new drive belt onto the crankshaft pulley so it sits securely on the pulley.
Replace the debris shield and bolts along with the bottom drive cover screws. You can now replace the blade, blade support, and blade bolt. I do highly recommend you check your mower blades’ condition before you install them.
This is a good opportunity to sharpen your blade or replace it if it appears to be damaged or too worn to be sharpened.
Don’t forget to remove the block of wood and plastic bag or tape from the fuel tank. Reconnect your spark plug on a gas mower or your battery in a battery-powered lawn mower. That’s it. You have changed your Craftsman push mower belt.
Change the Deck Belt on a Riding Craftsman Lawn Mower
Changing a deck belt on a riding Craftsman mower takes a little more time than changing a belt on a push mower because you need to remove the mower deck. Here are the steps:
Step 1: Gather the Proper Tools to Change Your Craftsman Belt
Before you begin, here’s what I recommend you have in addition to your replacement deck belt:
- Socket wrench set
- Screwdriver set
- Pliers
- Work gloves
- Safety glasses
Again, I recommend using an OEM Craftsman belt from the manufacturer. These tend to hold up better and cause fewer problems than trying to match the belt using an aftermarket deck belt. It can also be a safety concern if the belt is not correct.
Step 2: Prepare Your Craftsman Riding Lawn Mower
Before you start changing out your mower deck belt you need to take some safety precautions. First off, remove the ignition key and remove the spark plug wire so your Craftsman doesn’t start while you are working on it.
Lower your mower deck to its lowest position and make sure the mower blades are not engaged. Set your parking brake.
Step 3: Start Detaching the Deck Belt and Other Components from Your Riding Mower
There are a lot of parts on your Craftsman riding mower that needs to be removed and disconnected in order to change out your deck belt.
Because there are a lot of components that need to be removed, it is handy to have your owner’s manual beside you to refer to when changing out your belt just in case you have a hard time finding a component.
You may be able to find some diagrams and manuals at SearsPartsDirect.com in case your manual is missing. Just have your model number available when you search online to make sure you are looking at the right mower diagram.
Take a look under your Craftsman riding mower for the deck belt wrapped around the engine pulley. Carefully remove the belt from the pulley, releasing the belt from its keepers.
Next, you find a front link support retaining pin and washer under the engine pulley that must be removed. Detach the support rod from the deck.
On the left side of the mower, you will remove the clip to detach the suspension arm. You will also need to remove the clip and washer on the left rear deck bracket so the bracket is released from the deck.
Repeat these same steps on the right side of the mower to detach the suspension arm and right
Step 4: Pull Out the Deck, Remove the Lock, and Disconnect the Blade Cable Spring
With every bracket holding your deck to your mower disconnected, you are almost ready to slide the deck from underneath your lawn mower.
Before you slide it out completely, you will need to pull the blade cable (PTO cable) out of the deck bracket by removing the cotter pin. You will also need to disconnect the blade cable spring from the idler arm.
Now that the cable and spring are removed, verify you didn’t miss disconnecting any other component attaching your deck to the mower.
You can completely move the deck out from underneath your lawn mower once you have confirmed nothing from your deck is attached to your mower.
Step 5: Remove the Belt Covers and Remove the Deck Belt
Remove your belt covers from the pulleys by removing the hex screws. Before you remove your Craftsman deck belt, it’s a good idea to take a look at how the belt is routed around your pulleys so you can make sure you install your belt correctly.
Sometimes there is a label on your mower that will show how your deck belt fits around your pulleys. I like taking a picture of the belt before I take it off since I usually have my phone on me so I can take a photo with it.
Once you’re confident you know how it should look with a new ground deck belt, you can go ahead and remove the old one from the idler and spindle pulleys. You might have to loosen the nut on the left idler pulley to get the belt to come off.
Step 6: Install the New Craftsman Belt
With the old deck belt removed from the lawn mower, you can start installing the new belt by looping it around the outer spindle pulleys and then around the idler pulleys.
Retighten the nut on the left idler pulley if you had to loosen it to remove the belt. Reinstall the belt guards.
Step 7: Reinstall the Craftsman Mower Deck
Slide the mower deck under the mower and secure the brackets, rods, blade cable, and spring. Secure any other components that were removed earlier.
Once everything is secure, pull the right side of the belt to place on your PTO pulley. The narrow side of the belt should be rolled up and into the pulley while you are slowly rotating the pulley until the belt slides into place.
Once your belt is fully installed, rotate the belt by hand to make sure the belt is securely in place around each pulley. Reinstall the spark plug boots.