
Changing and sharpening your mower blades is a necessary task as an owner of a Troy-Bilt lawn mower. You invested money into your lawn mower, and without proper maintenance, you won’t get the best performance out of your lawn mower.
This maintenance includes making sure your mower blades are sharp and in good condition. There’s no sense in buying a nice Troy-Bilt lawn mower only has a bad cut because of dull blades.
I will share everything you need to know about your Troy-Bilt mower blades including how to care for your blades and preventative measures you can take to extend the life of your blades.

This post may include affiliate links. Purchases made through these links may provide a commission for us, at no extra cost to you. As an Amazon Associate, we earn from qualifying purchases.
Follow all safety instructions provided in your equipment operator’s manual before diagnosing, repairing, or operating. Consult a professional if you don’t have the skills, or knowledge or are not in the condition to perform the repair safely.
How Often Should You Change Your Mower Blades?
You should change your Troy-Bilt lawn mower blades at least once a year. I like to start each season with a new set of mower blades. Your blades will have to be sharpened during the mowing season to keep them sharp to give your lawn a nice cut.
How Often Should You Sharpen Your Mower Blades?
Your Troy-Bilt lawn mower blades should be sharpened after every 25 hours of use. This is approximately twice a year for the average homeowner. It’s best to keep your blades sharp.
You need to periodically check your blades for wearing and damage. Mowing in conditions with more dirt and stones will require more frequent sharpening than mowing in conditions with a thick lush lawn.
Do New Mower Blades Need to be Sharpened?
Troy-Bilt lawn mower blades do not need to be sharpened when they are purchased new. They are sharpened during the manufacturing process and just have a coat of paint over the edge. New blades are ready to be installed on your Troy-Bilt mower deck.
Inspect Your Mower Blades for Damage
Lawn mower blades can become damaged causing your Troy-Bilt mower to have an uneven or bad cut. In addition to damaged blades causing a bad cut, there are many other reasons that can give you an uneven cut as covered in this article.
It’s important to inspect your Troy-Bilt blades for damage and replace them. Here are a few conditions you need to look out for:
Wearing on the Blade Sail
The sail of the mower blade can wear from sand and dirt that is sucked into the deck during mowing. The top of the sail will appear thinner at the ends than it does toward the center of the blade.
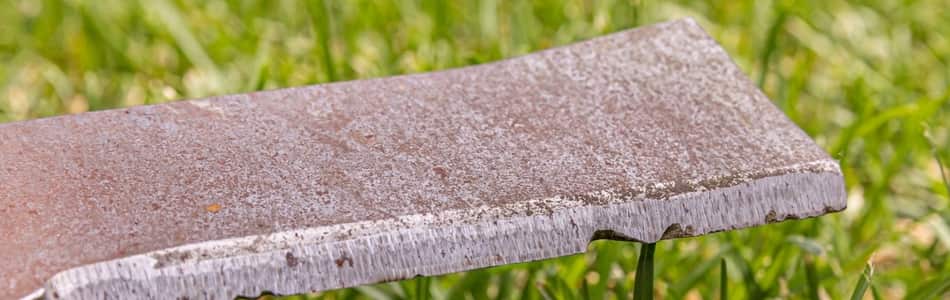
Chips & Dings in the Blade Edge
Your mower blades can get chips and dings in them when they hit stones and other items in the yard. Small chips and dings can usually be removed by sharpening your mower blades.
If you have large chips and gouges in your blades, you should replace your blades to achieve a nice-looking cut.
Blade is Bent
A mower blade can bend when you impact a hard object. Sometimes it’s a significant bend and other times It is only a slight bend. Either way, you must replace a bent blade, not only for the quality of cut but also to prevent additional damage to your Troy-Bilt mower.
You should never attempt to straighten a bent blade even if it is only a little bend. Straightening a metal mower blade compromises the integrity of the material and weakens it.
There is a possibility of having a piece of the blade breaking off. When this happens as the blade spins at high speeds, you can subject people, pets, or other items to potential danger from flying metal.
- Check for a bent blade by removing it from the deck
Remove your blade from your mower deck and place it on top of a new blade to check for a bend in the blade. When the used blade doesn’t lay flat against the new blade and you notice a bend, you must replace the blade. - Check for a bent blade while installed on the deck
You can also check for a bend in your blade while it is installed on your mower. To do this, park your mower on a hard-level surface.
Take a measurement from the ground to the blade tip and then rotate your blade 180 degrees and take another measurement from the ground to the blade tip. If the measurement is greater than a 1/8” difference, you need to remove and replace your lawn mower blade with a new blade.
Another thing to remember is, when the impact on your blade is significant, you can damage your blade spindle and housing. You need to check this before you remove your blade.
Do this by grabbing a hold of both blades and rocking the blade up and down. Wear a good pair of gloves so you don’t cut your hands on your blade edges.
Feel for movement and listen for a knocking sound. If you notice either of these, you need to remove your spindle housings and check for damage. You can usually replace your Troy-Bilt spindle bearing or replace the whole spindle assembly.
Blade is Cracked
Replace the Troy-Bilt blade if you find a crack. Using a blade that is cracked can be extremely dangerous.
A cracked lawn mower blade has the potential to break off while mowing which can send flying metal through the air. This could injure a person or cause damage to the siding of a home.
Items that Can Damage Your Mower Blade
You can prevent some premature wear and damage on your Troy-Bilt blade by removing any items from your yard before you mow. Take time to walk through your yard and look for objects that can damage your blades and remove those objects from your yard.
- Sticks, Rocks, and Toys
Solid items in your yard that are run over by your Troy-Bilt can damage your mower blade. A fast-spinning blade impacting sticks, rocks, toys, and other items can cause your blade to bend or become gouged. When you have a significant impact, vibrations can be felt through your mower from spindle housing damage and unbalanced blades. - Sand & Nature’s Debris
Sand and debris can cause your Troy-Bilt blades to become dull and worn at an increasing rate. A lawn that is sparse with grass with have a lot of sand in the yard that is pulled into the mower deck and wearing your blades.
While you’re waiting for your grass to fill in and become a thick carpet of grass, there’s not much you can do to prevent the amount of dirt from entering your deck. You just need to make sure you check, sharpen, and replace your blades more often. - Lawn Chemicals
Some homeowners choose to use chemicals on their lawns to help with lawn health and growth. Some of the chemicals used can corrode your deck components and cause your blades to fuse to your mower deck. Remove your mower blades periodically to ensure they don’t form a tight seal that prevents you from removing them next time.
How to Remove & Change Your Mower Blades
Here are the steps to remove your Troy-Bilt Blades:
Gather tools to remove blades
- Ratchet
- Work Gloves
- Safety Glasses
- Torque Wrench
- Cordless Impact Gun (Optional)
Remove the Spark Plug Boot
Always remove the spark plug boots and the ignition key from your Troy-Bilt mower. You do not want the mower to start with you under the mower deck.
Stay safe by following this safety tip along with wearing safety glasses and using work gloves to protect your hands from the sharp edges on your blades
Remove Mower Blades
Remove your mower blades using a socket and ratchets. If they don’t come off easily, you may want to use a cordless impact gun.
You can also attempt to remove stubborn bolts by placing a block of wood over the head of the bolt. Hit the block with a hammer to loosen the bolt so you can turn it.
Remove the bolt, blade, and any washers your blade may use. Reinstall your blades and parts in the opposite order you took them off. If you are reusing your blades, make sure they are balanced before reinstalling.
How to Safely Sharpen Lawn Mower Blades DIY
You can save some time and money by sharpening your own Troy-Bilt mower blades. There are several different tools that can be used to sharpen your blades including a metal file, a drill-powered blade sharpener, or a disc grinder. Follow these steps to sharpen your blades:
Gather the tools you will need
- 10″ flat metal file, drill-powered blade sharpener, or disc grinder
- A vice to hold the blade in place
- Blade balancer or nail on the wall
- Rags
- Wire Brush
- Safety glasses
- Work gloves
Put on Safety Glasses and Gloves
Clean the Blade
Use a rag to clean the dirt off your mower blades. A wire brush can be used for stubborn areas of buildup.
Secure Your Blade
Securely place your blade in a vice to keep it from shifting during sharpening. After sharpening one side, you will flip the blade and secure it in the vice while you sharpen the other side.
File or Grind Blade to Sharpen Edge
Sharpen with a metal file
- Using a file, push the file at an angle in one direction along the blade.
- Do not use a sawing motion when filing.
- Once all the rough spots and uneven edges are removed, flip the blade over, secure it in the vice, and sharpen the other side.
Sharpen with a drill-powered blade sharpener.
- Power the drill with the blade sharpener attached.
- Place the flat guide of the sharpener along the flat portion of the blade with the cutting edge slot into the bevel.
- Move the sharpener up and down the length of the blade edge.
- Once one side is sharpened without any rough spots or nicks, flip the blade over, secure it in the vice, and sharpen using the same procedure.
Sharpen with an angle grinder or bench grinder
- Hold the angle grinder perpendicular to the edge of the blade. Run the grinder along the length of the blade to level out any rough spots or nicks. Keep the grinder moving so it removes a little metal at a time and produces an even result.
- Once one side is sharpened without any rough spots or nicks, flop the blade over, secure it in the vice, and sharpen using the same procedure.
Balance Your Mower Blades
After you sharpen your mower blades, it’s necessary to balance them so you don’t damage your lawn mower. To have balanced blades means each side of your mower blade is equally weighted.
When they don’t have the same weight on both sides of the blade, the blade can cause your mower to shake and cause potential spindle housing and engine damage.
Use a blade balancer to check for equal weight on each side of your blade. This inexpensive item can save you from a large repair expense as a result of not having your blades properly balanced.
To balance your blades, shave metal off the heavy side of the blade until the weight of the blade is equal on both sides.
Another option to check the balance of your blade is using a nail on the wall where the nail head sits about an inch away from the wall.
Place the center hole of the blade over the nail and watch to see if the blade hangs lower on the right or left-hand side of the blade. You will want to remove more metal off the side that hangs lower until the blade sits level on the nail.
When You Should Seek a Professional Sharpening Service
I can sharpen my mower blades myself and I even have the tools to do so, but I still choose to have my local lawn mower dealership sharpen my blades.
The dealer does a much better job than I do and it’s convenient. I drop them off at the dealership and pick them up a couple of days later.
The timeline works for me because I always have a second set of sharpened blades on hand so the wait doesn’t bother me. You may choose to have a professional sharpen your blades because:
- It is a safer option to sharpen the blade yourself
- Sharpening a blade is often less expensive than purchasing a blade
- A professional can grind down mower blades to get rid of large nicks and gouges in the steel
- The blade is properly balanced. This will reduce vibration and damage to your mower deck.