
Have you ever been in a hurry to get your lawn mowed before the sun goes down? You decide to skip checking over your mower and end up breaking down in the middle of your yard.
Quick check overs of your lawn mower between your regularly scheduled maintenance routine will help you keep your equipment in top condition.
These quick checks can alert you to a problem developing in your lawn mower and potentially save you from a much larger repair. Pretty much every piece of equipment with an engine has a checklist that should be reviewed before operating.
So why don’t most people use a checklist for their lawn mowers and yard equipment when they are looking for the best performance from their machine?
I think the main reason is that most people think the checks are just plain common sense. Some of it is common sense, but other items are not.
If I were to start a checklist for my truck before I go on my next road trip it may look like this: check engine oil, belts, battery, washer solvent, coolant, tires, air pressure, spare tire, and insurance papers. I’m sure you could add to this list.
You should have a checklist like this for your lawn mower. Most lawn mower manufacturers make a checklist of daily items you need to review before each use of the mower.
Not many people read that information and don’t worry about it until they run into a problem. Let’s make sure you’re not one of them.

This post may include affiliate links. Purchases made through these links may provide a commission for us, at no extra cost to you. As an Amazon Associate, we earn from qualifying purchases.
Follow all safety instructions provided in your equipment operator’s manual before diagnosing, repairing, or operating. Consult a professional if you don’t have the skills, or knowledge or are not in the condition to perform the repair safely.
Lawn Mower Checklist Before Each Use
This list may seem substantial and long, but it should take about five minutes to perform the checks and a bit longer if you do find items you need to address.
Taking care of these items before you start mowing is a whole lot better than addressing them out in the yard if your mower fails partway through your cut.
Most mowers have similar checklists but consult your owner’s manual for any additional required items specific to your lawn mower.
1: Check & Fill the Fuel Tank
This one may seem simple, but I can’t even begin to tell you the number of times my mower sat in the middle of a half-cut lawn because my sons didn’t take the time to do the pre-mowing checks and ran out of fuel.
They were too busy trying to get their chores done so they could go hang out with their friends. In a well-ventilated area, check the fuel level in your tank and fill it if needed.
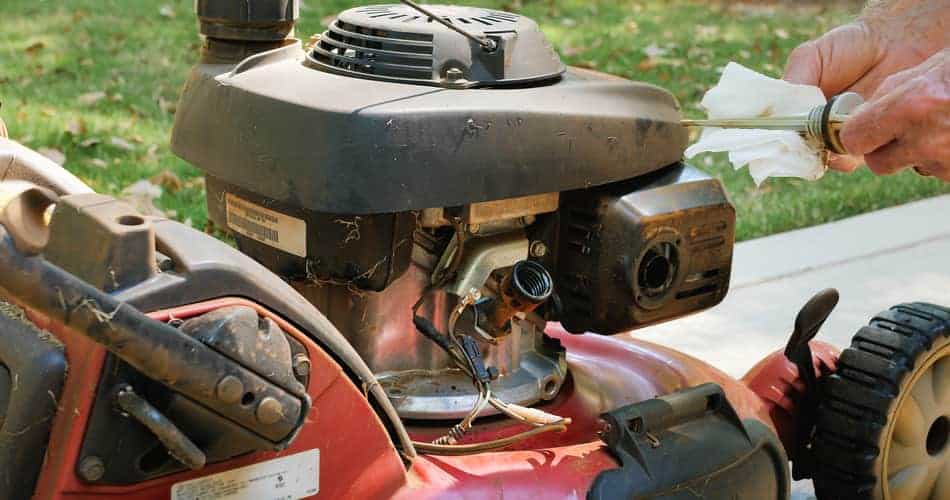
2: Check the Engine Oil
Park the machine on a level surface, shut off the engine, and remove the key. Make sure the engine oil is at the appropriate level. Do not run the machine with too little oil or when it is overfilled with oil. Running the engine outside of the recommended manufacturer’s oil level can damage the engine.
The oil you use will be either SAE30 or 10W-30 air-cooled engine oil on most engines. Refer to your operator’s manual for your manufacturer’s oil recommendation. While you’re in the engine area, check the air filter and clean it if needed.
3. Check the Air Filter
Running a dirty air filter can restrict the air your mower requires. This can lead to your engine running rich, meaning it is burning a higher mixture of fuel than air, causing it to smoke.
A lack of air can also cause engine overheating and significant engine damage. Taking time to check your air filter can save you from a large repair bill.
Remove your air filter from the housing being careful not to allow any dirt and debris to fall into the air intake. Wipe out any dirt remaining in the air filter housing with a dry cloth. Follow the instructions for your type of filter.
- Paper air filter element
Tap the filter on a hard surface to knock out loose dirt. Check to see if you can see light shine through the paper by holding your filter up to a light source. If you can see light, go ahead and continue to use your filter. If not, it’s time to replace your filter with a new one. - Foam air filter primary element (these instructions are not for foam pre-filters)
If your find your foam filter has brown spots or tears or has become brittle, you must replace your filter. If it appears okay, continue cleaning your filter. Wash your filter with water and mild dish soap.
Rinse to remove soap. Lay flat to air dry. Placing it in the sun will help it dry faster. Once it is dry, use a foam filter oil to lightly saturate your air filter following instructions on the filter oil bottle. (You can use clean engine oil too). Reinstall the filter.
4: Check the Mower Blades
With the machine still turned off and the spark plug removed check the mower blades. Never reach under the deck while any parts of your mower are still moving. Lift the discharge chute and take a look at the blades to see if they are sharp and if there is significant grass buildup.
If you find either dull blades or grass buildup, you will need to gain access under the deck to remove the grass buildup and sharpen or replace lawn mower blades.
5: Check the Tire Pressure
Check the pressure in your tires if you are running air-filled tires. Usually, the tire pressure required is about 12-15 psi depending on the size of your tire.
6: Check Belts
Take a quick look at the belt(s) to make sure there are not any visible cracks in the belt. You don’t want to get halfway done with your yard and break a belt.
7: Check Linkages and Deck Engagement Lever / PTO Switch
On a riding or zero-turn mower, while sitting on your mower, move your throttle linkage and your choke linkage to make sure they move freely. Next move the deck engagement lever or PTO switch, if your mower has one, and make sure it moves.
8: Check Safety System
Check all of the items your mower is equipped with. If your mower fails any of these inspections, do not operate the machine until it is repaired.
- Rollover Protection Structure (ROPS)
Check mounting hardware to make sure ROPS is secure. If your lawn mower has a folding ROPS system place the roll bar in an upright position and makes sure it is securely in place. Some machines use knobs while others use pins to hold them in place - Seatbelt
Check for any wear or cuts in the belt. Make sure the latch is working properly. Replace the belt if you notice the latch isn’t working or there is any physical damage to the belt. - Operator Presence Control Systems
It’s important to ensure all safety switches are in working order. The mower should shut down and the PTO does not engage when the operator is not in the seat on a riding mower. On newer push mowers, your mower should have an extra lever or bar to hold down to keep the blades engaged.
Cleaning Your Lawn Mower After Each Mowing
It’s important to keep your mower clean and dry before returning to storage in between mowings. Always remove debris from your mower so the moisture from the clippings doesn’t sit on your mower or collect in your pulley & belt system or underneath the mower deck.
A leaf blower is a great tool to keep the mower clean and dry.
Store your lawn mower in a dry location. You will want to perform more in-depth cleanings periodically throughout the mowing season. You can find more information on cleaning your mower here.
Experiencing Problems with Your Zero Turn?
Many different types of problems can develop in a zero-turn mower. It doesn’t matter what brand you own.
While some zero-turn mowers are built with stronger materials, bigger filters, better engines, and tougher spindle housings, they are all going to break down and cause problems at some time. Some may just not develop problems as quickly as others.
To help you find the causes of many zero-turn problems, I put together a guide with common zero-turn problems. In this guide you will find a list of causes and solutions for problems including a zero-turn dying, smoking, vibrating, not starting, having cutting issues, and more.
Check out my guide at Common Zero Turn Mower Problems: How to Fix Them
If you still can’t find the solution to your problem or you don’t feel comfortable troubleshooting or repairing your mower, it is best to have an experienced mechanic check out your zero-turn.
You can visit your local dealership that provides repair support for your brand mower. You may also find a lawn mower repair shop with experienced small engine mechanics.