
You finally find time to mow your lawn and then you find your lawn mower battery is dead. It’s frustrating when you have to go through extra steps to get your mower started by charging or replacing the battery.
In my line of work at a lawn mower repair facility, I often get asked, “What keeps draining my lawn mower battery?” so I’m going to try to help you out if you are running into the same problem.
Your lawn mower battery can keep dying and draining from loose battery cables; dirty or loose wiring connections; a faulty charging system; a bad battery; or leaving the ignition key in the on position.
Before you run out and replace your lawn mower battery, read on to see what may be causing your battery to keep dying.
Always disconnect the negative cable (black) from the battery before making any repairs to the electrical system.

This post may include affiliate links. Purchases made through these links may provide a commission for us, at no extra cost to you. As an Amazon Associate, we earn from qualifying purchases.
Follow all safety instructions provided in your equipment operator’s manual before diagnosing, repairing, or operating. Consult a professional if you don’t have the skills, or knowledge or are not in the condition to perform the repair safely.
This is Why a Lawn Mower Battery Keeps Dying and Draining
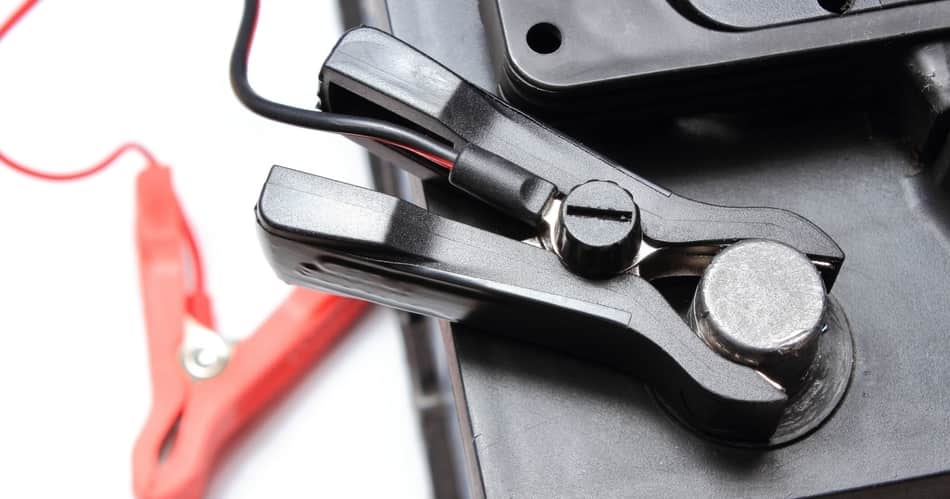
1. Loose Cables
The first thing you should do is check the battery and cables to see if the cables are loose, not only loose on the battery but loose elsewhere as well.
This means you need to look at the battery first and then follow the red cable (positive cable) down from the battery to the solenoid. Continue to follow it down to the starter.
Learn more about solenoids and testing them with our article “How to Tell Your Lawn Mower Solenoid is Bad“.
2. Corroded Connections
While you are looking for a loose wire, you need to inspect the connections to make sure they are in good shape. If you find the connections are green or white with a lot of corrosion around it, that can be your problem.
You will need to remove the corroded connection. Before you can do this, you need to disconnect the battery cable.
To disconnect the battery cable, you will need to remove the negative cable from the battery to break the electric circuit.
If you don’t break the circuit and accidentally hit the frame or other metal with your wrench while removing the battery, the battery may arc the wrench and throw sparks which could potentially blow up the battery.
Because of this, you need to always wear safety glasses and gloves when working with your battery. Once the negative cable is removed you can safely remove the positive cable (red) with no worries.
Note: A good way to remember which cable to remove first is to remember the positive cable is the last one off and the first one on.
With the cables removed from the battery, you can take off the rest of the cables that may need to be cleaned or replaced. Cables and connections can be cleaned with a baking soda and water solution.
Mix 4 cups of water with about six rounded tablespoons of baking soda to make a paste. Spread this paste on any corrosion you find. The paste will begin to foam while it cleans the cables.
This can get pretty messy so you may want to rinse the solution off of the cables outdoors. Rinse the paste areas with water.
A wire brush can be used to speed things up. Another solution that works to remove corrosion is cola soda.
3. Faulty Lawn Mower Charging System
Now that you have your cables taken care of, look into the charging system on the lawn mower. There are not that many charging systems on the market today.
Depending on how big your lawn mower may be, you may have an external alternator like the ones on our vehicle or you may have an internal one under the flywheel. Most lawn mowers will have an internal alternator.
You will need a volt-ohms meter to test the charging system. First, you will need to turn on the meter to make sure it is registered to read 12 volts. Touch the leads to the battery with the engine off.
This is called reading battery voltage. The meter should read between 12.4 volts and 12.8 volts. Some batteries will read higher depending on the rate of charge and the condition of the battery.
Write down the number registered on your volt-ohms meter. Then set the parking brake and start the engine. Now touch the leads to the battery with red on positive (+) and black on negative (-).
Run your mower at about 3/4 throttle and check the meter reading. This reading should register between 13.2 volts to 13.9 volts or higher. When this reading is higher than the initial reading taken while the engine is off then your alternator is charging the battery.
If the reading from the last test doesn’t change from the reading of the first test then you have an issue with your charging system. The cause may be a bad regulator or a bad stator/alternator.
You will have to perform another test or take your lawn mower to a repair shop to determine what part has failed. Some systems are 15 amp while others are 20 amp. The size depends on the manufacturer and engine specifications.
If your cables are not dirty, you can perform the test above on your battery using a volt-ohms meter at any time. Performing this test may also identify a bad connection as well.
4. Ignition Key is Left On
Leaving your ignition switch on when you get off your mower won’t affect your battery much unless you have an oil light on the dash or leave your 12-volt accessory cord plugged into your port if you have one installed on your lawn mower.
If you do leave the key on and your battery is dead when you go to use your lawn mower, there are a couple of ways to charge your battery. Using a battery charger, hook up the charger to the battery the same way you hook up your volt meter.
The red cable attaches to the positive (+) terminal and the black cable is attached to the negative (-) terminal. This battery charger from Amazon works well.
Charge Your Lawn Mower Battery – Method One:
- Disconnect the battery cables from the battery. Remember: Positive cable (Red +) is the last one off and the first one on. Now, if the battery has removable caps check the water level.
If the plates inside the battery are not covered with water you will need to add distilled water to them. Note: well water is not good for a battery. City water is a little better option, but it is best to use distilled water for your battery. - After checking the water level, hook the charger to the battery.
- Check the battery voltage with your meter and see what it has in it. If the battery has 11.8 volts in it you won’t have to charge it very long.
If it has 10.1 volts your battery is going to need to sit on a charger for a while. The lower the voltage reading, the longer your battery will need to sit on the charger.
I like to put a very low battery on what is called a “slow bake”. Some battery chargers have different switches on them such as 6 amps, 4 amps, or 2 amps.
Charge a very low battery on 2 or 4 amps and let it charge for about an hour. After an hour, check the reading to make sure the voltage rate is increasing. If it is, continue to charge for another hour.
Charge Your Lawn Mower Battery – Method Two:
If the reading on your battery isn’t too low and you need to use your mower, place the battery on a charger up to 6 amps for about a half hour to get the battery to about 12 volts.
Once the battery reads 12 volts, remove the charger and start the lawn mower. Keep the throttle up to 3/4 to full throttle and the battery should charge while the mower is running.
Once you are done mowing, check the battery reading to make sure you are in good shape for your next mowing.
5. Bad Battery
If you find your battery will not charge above 12 volts when you have had it on a charger for at least an hour or two you will need to replace your battery.
Remove the battery from the mower and bring it to an automotive store or lawn and garden store to replace it.
Most stores will charge you a battery core fee if you don’t return an old battery at the time of purchasing a new one. The core charge is usually between $15 and $25.
Most batteries are fully charged when you get them, but you may have to charge the battery if it has been sitting on the shelf for quite a while.
You can place the battery on a battery charger to fully charge it before placing it in your mower or you can jump-start it.
Jump Start a Lawn Mower Battery
Jump-start a lawn mower battery by using a good battery like the one in your car. The battery in a car is 12 volts and the battery in most mowers is 12 volts. Confirm both batteries are 12 volts before attempting to jump-start the mower.
Pull the car up next to the lawn mower and shut off the engine.
Grab your jumper cables and hook up the red positive (+) cables first to the positive terminal on the mower and then to the positive terminal on the car battery.
Then take the black negative (-) cable and place it on the car battery’s negative terminal. Connect the black mower side cable to the frame of the mower.
Set the brake on the lawn mower and start the lawn mower. Let the mower run for a few minutes. Remove the cables and you should be good to run your lawn mower.
Don’t start the car’s engine. The car’s battery will provide enough power to start the mower. Once the mower starts, allow the mower to run for a few minutes.
Remove the cables in the opposite order you installed them. The mower’s alternator will keep the battery charged.
Once again, you can check the condition of the battery with a volt meter to see how the battery is charging. Read this article on jump-starting a mower with a car battery.
Most Batteries Are Good for At Least 3 Years
If you are changing your battery out more often than 3 years, you may have a problem with your battery connections or battery. Most batteries will last at least three years if you properly take care of them.
Keep the battery cables clean and make sure the cables stay tight and the battery is securely held down on the machine. Most batteries fail because of vibration so make sure your battery is sitting securely in the battery tray and isn’t bouncing around the tray while you mow.
The plates in the battery will not take much of a pounding The plates can start to break up inside deteriorating the battery.
Lawn Mower Battery Size
When you are looking at purchasing a new battery you should consider purchasing a battery with at least 300 cold cranking amps (cca) if your deck is run with an electric clutch.
The more cold cranking amps, the stronger the battery. If you don’t have an electric clutch you can get away with using a smaller battery like 250 cca, but bigger is better.
Related Items
Lawn Mower Battery Charging
Learn more about batteries, charging, and charging times with our article “Lawn Mower Battery Charging Times Explained“.
Winter Lawn Mower Battery Care
Taking care of your battery during the cold winter months is crucial to maintain the life of your battery. Learn more about the steps you need to take before storing your lawn mower for the winter months. “A Guide to Winter Lawn Mower Battery Care“.