
The carburetor regulates the correct ratio of air to fuel mixture allowed into the cylinder to create a combustion. When the carburetor is dirty and air or fuel is being restricted, your engine may begin consuming more fuel, having running problems or it may not be getting fuel.
Symptoms of a Bad Carburetor on Your Cub Cadet Mower
There are several symptoms you may experience when a carburetor is running too rich or too lean. Too rich is when the engine is receiving too much fuel. Too lean is when the engine is receiving too much air. These lawn mower bad carburetor symptoms include:
- Cub Cadet won’t start
- Cub Cadet starts and then dies
- Cub Cadet backfires from running lean
- Engine is sputtering and running rough
- Engine is surging
- Black smoke out of the muffler from running too rich
- Cub Cadet is consuming too much fuel

This post may include affiliate links. Purchases made through these links may provide a commission for us, at no extra cost to you. As an Amazon Associate, we earn from qualifying purchases.
Follow all safety instructions provided in your equipment operator’s manual before diagnosing, repairing, or operating. Consult a professional if you don’t have the skills, or knowledge or are not in the condition to perform the repair safely.
12 Steps to Clean Your Cub Cadet Carburetor
Spray Carburetor Cleaner in the Air Intake
Start off by removing your air filter from the air filter housing. Spray carburetor cleaner into the air intake. Start the engine to see if it will fire up and continue to run. If it does fire up, but it shuts down, you must disassemble your carburetor to clean it.
Gather Tools and Items Required to Clean Your Cub Cadet Carburetor
- Pliers
- Screwdriver
- Socket/ratchet set
- Carburetor cleaner
- Thick wire
- Needle nose pliers
Take Photos for Reassembly
I recommend taking many photos during your disassembly process. There are so many small parts that need to come apart, it is hard to remember exactly where they all go once you have taken your carburetor apart.
Taking several pictures to refer to when reassembling your carburetor will be very helpful.
Shut off the Fuel Supply
Stop the fuel supply by turning off the fuel shut-off valve or using a fuel hose pinch-off pliers to crimp the fuel line. Remove the fuel line from the carburetor.
Remove Throttle Cable & Choke Cable
If your mower has a throttle and choke cable, remove it at this time.
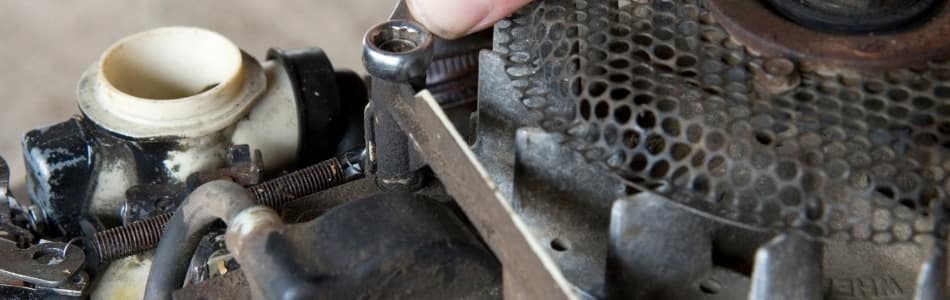
Detach the Filter Housing
Remove the screws and nuts attaching the carburetor to the filter housing.
Remove the Springs
Slowly remove the springs. You must be careful and not stretch out the springs. You may have to twist the carburetor a bit to get the springs off. Make sure you don’t tear the gasket located between the engine block and the carburetor.
Remove the Float Bowl
The float bowl is located on the bottom of your carburetor. This is the place gasoline is stored inside your carburetor. It is held on by a screw. Clean around the outside of your carburetor bowl to remove dirt before removing the bowl.
Next, remove the screw from the bottom of the bowl. Have a rag available to catch any remaining gas in the bowl.
When you remove the bowl, be careful to not damage the o-ring between the bowl and the carburetor. This o-ring looks like a rubber band. Do not get carburetor cleaner or any other substance on your o-ring. This will cause your o-ring to stretch so you won’t be able to reuse it.
Check the Stem for Clogged Holes
The stem is the piece that hangs down from the center of the carburetor. When the holes on the stem get clogged from old fuel, it will not draw fuel up to the jet. A flashlight will help you better locate the holes. Use a thick wire to unplug them.
Check the Carburetor for White Crusty Buildup
The white buildup is the result of fuel additives including ethanol. Try to remove as much of the white crusty material as possible using carburetor cleaner. It is almost impossible to get all the white deposits out of the carburetor.
Reassemble the Carburetor
Now that your carburetor is clean, reassemble it in the reverse order you took it apart. Reference the photos you took earlier when putting your carburetor back together to make sure you get all the small parts in the right places.
Reattach components to your carburetor including the springs; filter housing; throttle and choke cable (if it uses one); and the fuel line.
Fill Your Fuel Tank with Fresh Gas with a Fuel Additive
Start your fuel flow. Use fresh gasoline mixed with a fuel additive, like Sea Foam Motor Treatment, in your Cub Cadet’s fuel tank. Give the fuel a chance to fill the bowl of your carburetor and start your engine. Check out the advantages of Sea Foam here.
If you are starting with a pull cord, give the rope a yank. It may not start on the first pull, but it should start after several pulls and continue to run.
Replace or Rebuild Your Cub Cadet Carburetor
If cleaning does not work because your bad carburetor is corroded or has damaged parts that need to be replaced, it may be your best choice to replace the carburetor.
To make sure you get the correct carburetor, have your engine model and spec number available when ordering your new carburetor from your local engine dealer or online.
A carburetor rebuild kit to repair your carburetor may be available for your carburetor if you choose to rebuild your carburetor instead of replacing it. Check the cost of the rebuild kit in comparison to a new carburetor. You may be surprised to find there might not be a significant price difference.
Cub Cadet Problems that Could Be More than a Carburetor Problem
A dirty or bad carburetor can be a cause of your Cub Cadet mower not starting, quitting after starting, and leaking fuel. There are many other items that can cause these problems. To find out more about these causes and how to solve them, check out the links below.