
Purchasing a zero-turn lawn mower is a big investment. Taking care of your zero-turn with regular maintenance will protect that investment. Servicing it can prevent significant, more costly repairs.
Service a zero-turn mower by checking the safety system, changing fluids and filters; replacing spark plugs; checking the tire pressures; removing dirt and debris from the engine and hydraulic system areas; sharpening blades; scraping the deck; and checking for loose or damaged components.
I will share the steps I take when servicing my zero turn and my customers’ zero turns. Warning: You need to take caution when working on your mower and mower deck. Remove the key along with removing the spark plug wires to ensure your mower doesn’t start when working on it.

This post may include affiliate links. Purchases made through these links may provide a commission for us, at no extra cost to you. As an Amazon Associate, we earn from qualifying purchases.
Follow all safety instructions provided in your equipment operator’s manual before diagnosing, repairing, or operating. Consult a professional if you don’t have the skills, or knowledge or are not in the condition to perform the repair safely.
Checklist to Service a Zero Turn Mower
A zero-turn mower should be serviced every 100 hours or annually, whichever comes first.
- Check the safety systems
- Check the starting system & battery
- Change engine oil and filter
- Check hydraulic oil. Change hydraulic oil and filter if necessary.
- Replace spark plug
- Replace the fuel filter and inspect the fuel lines
- Check tire pressures & lug nuts
- Clean or replace the air filter if necessary
- Remove dirt and debris from the exhaust, engine, and hydraulic systems
- Sharpen or change mower blades
- Scrape the deck
- Check the condition of belts and pulleys
- Lubricate the zero-turn and mower deck
Steps to Service a Zero Turn Mower
Collect Tools & Supplies
It is best to get all of the materials together before you start servicing your zero-turn.
- Engine Oil and Filter
- Hydraulic Oil and Filter, if needed
- Air Filter
- Fuel Filter
- Spark Plugs
- Socket or Spanner Wrenches
- Drain Pan, Funnel, Filter Wrench
- Rags, Work Gloves, Safety Glasses, Work Surface Cover
- Deck Scraper, Wire Brush, or Metal Putty Knife
Check the Zero Turn Safety Systems
Refer to your manufacturer’s operating manual to verify the safety system is working as it should. For example, the engine should not start if the parking brake isn’t engaged and the operator is not in the seat.
Your engine should also shut down if your PTO is engaged and the operator leaves the seat.
Go through all safety features of the zero-turn interlock system and ensure your mower’s safety features are reacting like they are designed to.
Also, inspect the rollover protection system (ROPS) and seat belt to make sure they have not been compromised and are in good working order. The ROPS system and the seat belt are designed to work together.
Zero-turn lawn mowers are dangerous. Keeping the safety system in good working order can reduce these dangers. Read “Dangers of Zero Turn Mower & How to Operate Safely” to make sure you are following the correct safety procedures.
Check Your Battery on the Zero Turn
Most zero-turn batteries are 12-volt batteries. Check your battery voltage using a voltmeter. If your battery reading is 12.6 volts or greater your battery is 100% charged. When the voltage reading is less than this, you need to charge your battery.
Make sure all cables are tight. Clean or replace the terminals if they are corroded.
Charge Your Zero Turn Battery
- Disconnect the battery cables from the battery. Remember: Positive cable (Red +) is the last one off and the first one on. Now, if the battery has removable caps check the water level. If the plates inside the battery are not covered with water you will need to add distilled water to them. Note: well water is not good for a battery. City water is a little better option, but it is best to use distilled water for your battery.
- After checking the water level, hook the charger to the battery.
- Check the battery voltage with your meter and see what it has in it. If the battery has 11.8 volts in it you won’t have to charge it very long. If it has 10.1 volts your battery is going to need to sit on a charger for a while. The lower the voltage reading, the longer your battery will need to sit on the charger.
I like to put a very low battery on what is called a “slow bake”. Some battery chargers have different switches on them such as 6 amps, 4 amps, or 2 amps. Charge a very low battery on 2 or 4 amps and let it charge for about an hour. After an hour, check the reading to make sure the voltage rate is increasing. If it is, continue to charge for another hour.
Change Engine Oil and Filter on Zero Turn Mower
Your engine oil and filter should be changed every 100 hours or annually to keep your engine lubricated with clean oil. Not changing your engine oil regularly can have damaging effects on the engine. Note: If your engine is new, you need to change the oil after the initial 5 hours.
Prepare Work Surface: Lay covering over your work surface to prevent spilled oil from penetrating the ground. Cardboard and newspaper work well.
Warm Engine Oil: Start your zero-turn, park it on top of the work surface cover, and let it run for 2 to 3 minutes to warm the engine oil. Warm oil flows better than cool oil. Take caution when working around the hot engine.
Remove the Key & Unplug the Spark Plug Boot: Remove the ignition key and spark plug boot(s) to keep your mower from starting while servicing your zero-turn. This is a necessary safety precaution to prevent serious injury.
Remove Engine Oil Plug: Clean dirt and debris from the area around the oil plug so you don’t contaminate the engine when removing the oil plug. Place a drain pan under the oil plug, remove the plug, and allow the oil to drain into the pan.
Some zero-turn engines use an oil hose port in place of a drain plug.
Replace Engine Oil Filter & Oil Plug: Using a filter wrench, remove the oil filter and replace it with a new filter. Place a light film of fresh oil on the gasket of the new filter and place it on the engine. Once all of the oil has drained, reinstall the drain plug.
Fill with Engine Oil: Fill the crankcase with the quantity and type of engine oil recommended by your manufacturer. You must make sure you have a sufficient engine oil level. It cannot be too low or too high as either level can cause damage.
Start Engine and Check Oil Level: Reinstall the spark plug boots and start your engine for a few minutes. Turn the engine off and let the oil cool. Recheck the oil fluid level. Add more oil if needed.
Change Hydraulic Oil and Filter if Necessary in Your Zero Turn
Operating your zero-turn with low or old hydraulic fluid can cause your mower to seem weak when moving. It can also cause extensive damage to the transmission. Change your hydraulic fluid and filters at the interval recommended by your manufacturer.
Keep in mind, most manufacturers have an initial break-in period where the oil needs to be changed sooner than the standard interval. Some initial break-in periods are as soon as 75 hours.
Some entry-level zero turns have unserviceable hydraulic systems that don’t allow you to change the hydraulic oil.
Refer to your manual for the correct procedures for changing your hydraulic oil as it can vary with each model. Air must be removed from the system after an oil change. For most mowers, raise the rear tires off of the ground.
Here are the most common directions for changing your hydraulic oil on a zero turn:
Park Zero Turn on Flat Surface: Remove the key and engage the parking brake. Wait for all moving parts to stop before working on your zero-turn. Note the engine and transmission can be hot. Take caution when working.
Locate Filters & Remove Guards: You will find the filter located near each rear wheel. There may be a guard or skid plate over the filter. Remove the guard and clean around the filters before removing them.
Don’t skip cleaning around the filters. You do not want to introduce any dirt or other foreign materials into the hydraulic system.
Remove Filters & Drain: Place an oil pan under one of the hydraulic filters. Unscrew the filter and let the oil drain. Repeat with the other hydraulic filter. Remove the drain pan and plan on bringing the old oil to your closest recycling center.
Install New Filters: Apply a thin layer of fresh hydro oil on the rubber seal of the new filters. Install the filters by turning clockwise. Once the filter makes a good connection to the filter adapter continues to turn about another full turn.
Fill with Recommended Hydraulic Oil: Fill with fresh hydraulic oil through the expansion reservoir. The expansion reservoir is the little small plastic tank on the top of your mower behind the seat.
Clean around this area before you remove the cap. Fill until it is at the “full cold” line on the tank. You may have two tanks, one on each side of the mower.
Once the plugs are tightened, keep adding oil until it reaches the “full cold” line shown on the expansion reservoir.
Some transaxles will have a vent plug located on each transaxle. Loosen this plug on each side. You will fill the hydro oil through the expansion reservoir until oil comes out of the vent plug.
Tighten the vent plugs and continue fulling until the oil level reaches the “cold full” line on the expansion reservoir.
Purge Air Out of the Hydraulic System: It’s important to get all the air out of the system by going through some steps with the drive tires turning freely.
In order to allow the drive wheels to turn freely, you will need to get the rear wheels off the ground. Do this by using jack stands to raise the rear of the mower just high enough so the wheels no longer touch the ground.
Start your mower and increase the throttle to about ½ throttle. Release the parking brake. Move the speed levers forward and reverse several times for a few minutes total until your wheels begin to rotate at a normal rate and with a normal sound.
Let the hydraulic system cool and re-check your oil level. Add more oil if needed.
Replace Your Zero Turn Mower Spark Plug(s)
You can inspect your spark plug for damage or excessive buildup on the plug. I prefer to change them out annually. It is a pretty inexpensive item to replace and not have to worry about your spark plugs not working for the season.
Replace the Fuel Filter & Inspect the Fuel Lines on Your Zero Turn Mower
Ethanol in fuel can break down and be corrosive to the fuel system and clog your fuel filter and fuel lines. Replace the fuel filter and inspect the fuel lines. Fuel lines need to be replaced when they become dry and brittle.
Check Your Zero Turn Tire Pressures & Lug Nuts
Make sure your lug nuts are tight and your drive tire pressures are equal on each side. They should be filled to the pressure shown on the tire side wall.
Uneven tire pressures can cause uneven cutting conditions. It can also cause your mower to pull one way causing your mower not to move in a straight path.
Clean or Replace Your Zero Turn’s Air Filter if Necessary
Your engine needs clean air to operate efficiently. Without access to clean air, your engine is starved of air and will overheat. Inspect your air filter frequently, and clean or replace it with a new filter when necessary.
Remove the Air Filter from the Filter Housing: Remove your air filter being careful not to knock any dirt into the air intake. Wipe any dirt left in the housing with a dry clean cloth.
Remove Dirt from the Air Filter: Tap the air filter against a solid surface to knock loose dirt from the filter. Do not use an air compressor to blow your air filter clean.
Check Air Filter Condition: Hold the filter up to the light. You are looking for the light through the paper element. If you can see light, the filter can continue to be used. If you see any blockages of light or the filter is damaged or oil covered, you need to replace it with a new filter.
Remove Dirt and Debris from Exhaust, Engine, and Hydraulic Systems
Remove the engine shroud and remove all dirt and debris from around the engine and exhaust areas. Clean any dirt that built up on and around the engine cooling fins.
Buildup around the engine prevents air movement to keep the engine cool and prevent overheating.
Continue cleaning around the hydro fan cooling fins, guards, and fan.
Check the Condition of Your Zero Turn Belts, Pulleys & Spindle Housings
When servicing your zero turns, belts and pulleys must be inspected. Worn belts and pulleys can cause your hydraulic pump or mower blades not to work properly. If your belts appear worn, cracked, or have a glazed appearance to them, you need to replace them.
Over time, bearings can wear and become damaged. To check the bearings in your pulleys, you will want to slowly turn each pulley to ensure they are still moving freely and you don’t feel any resistance.
While turning the pulley, listen for any noise coming from your bearing. Replace the pulley if you hear noise or feel resistance.
Check for bearing wear in your spindle housing. Do this by grabbing a hold of each side of the mower blade while wearing a good pair of work gloves to protect your hands from sharp edges.
Rock the blade with an up-and-down motion. If you feel movement, you need to replace the bearing or spindle housing assembly.
Note: Some manufacturers only allow you to rebuild a spindle housing, some only sell the spindle housing assembly while others offer both. Here are instructions to replace a bad bearing in the spindle housing.
Repair Zero Turn Spindle Housing with a Bad Bearing
Remove the Belt From the Pulley: Find something narrow to put between the belt and the groove of the bad pulley and carefully turn the belt by hand. Let the narrow object follow the belt to the pulley and pry up on the belt so it comes off of the pulley.
Remove the Pulley: Get a socket that will fit the nut on top of the pulley and remove it. In most cases, it will be a normal thread so turn it to the left or counterclockwise.
Depending on what type of mower you have, there may or may not be set screws holding the pulley onto the shaft. These may be allen screws or hex screws. They may not come off very easily and you may need to use a puller to remove them.
Remove the Spindle: There should be 4 to 8 bolts holding the spindle in place. Remove the bolts and the assembly will fall out of the bottom of the deck.
Replace Bearing: Please the housing assembly on a flat hard work surface. Check to see what you will need to disassemble the housing.
Sometimes a snap ring will hold it together and other times you will just replace the entire housing which includes the bearings. Replace the bearing if your assembly allows you to. Grease the bearing and attach it to the deck in the reverse steps you used to take it apart.
Reinstall Housing, Pulley, and Belt: Once you bolted the housing to the deck and install the pulley, make sure everything is tight and there isn’t any movement. Reinstall the belt. Turn the belt by hand to make sure it is on all of the pulleys.
Sharpen or Change Your Zero Turn Mower Blades
Dull blades will put extra strain on your zero turn in addition to giving you a poor cut. You may have noticed times when your lawn looks unhealthy with brown ends a couple of days after mowing. This is likely due to operating your zero turn with dull blades.
Not having sharp blades will beat up the grass instead of precisely cutting the grass. Each time you service the zero-turn mower you need to inspect your mower blades to determine whether they should be sharpened or replaced. If you find a blade that is damaged or bent you must replace your mower blades.
Read more about inspecting your mower blades and the different ways to sharpen your blade with my article “Inspect, Sharpen, and Replace Lawn Mower Blades”.
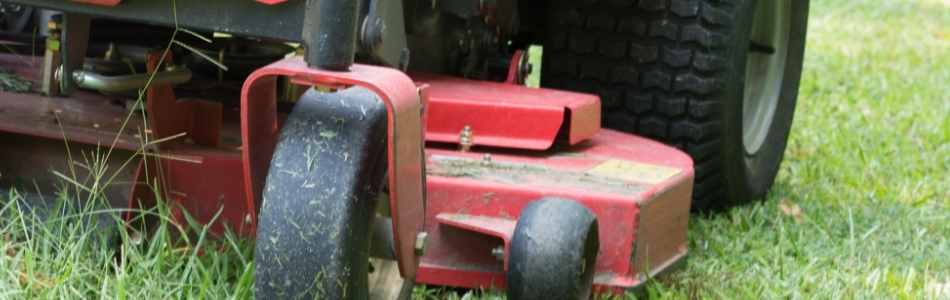
Scrape Your Zero Turns Mower Deck
Gain access to the underside of your zero-turn mower deck by using jack stands or one of these handy lifts from Amazon. Keeping the mower deck clean will provide you with a better cut and better mower performance.
Buildup underneath the deck compromises the air movement needed to create a good cut. The mower blade is designed to create air movement in the deck.
The blade along with the suction created in the mower deck makes the grass blade stand tall so the blade can pass by and precisely cut the grass blade.
Scrape the deck using a deck scraper or metal putty knife each time you service your zero-turn mower deck. A good stiff wire brush also works well.
Lubricate the Zero Turn and Mower Deck
Using a high-performance multi-purpose grease, lubricate the idler arm pivots on the deck and pumps and all other pivot points and grease zerks on your zero turn. Refer to your operator’s manual to verify all grease points on your mower. Some caster wheels will also need to be greased.
How Often Should You Service a Zero Turn Lawn Mower
A zero-turn mower needs to be serviced every 100 hours or annually. In between services, the engine, hydraulic, and deck must be kept clean and free of debris.
You must also check for sufficient oil levels and good tire pressures and a working safety system. The belts, filters, and mower blades must be in good condition.
Added Steps to Winterize Your Lawn Mower
While many of the steps remain the same when getting your mower ready for winter storage, it is important to prepare your zero-turn fuel system. You will also need to make sure your battery is properly cared for so it does not freeze over the winter.
Read more about winterizing your zero turn in my article here.
Still Experience Problems with Your Zero Turn Mower?
Many different types of problems can develop in a mower. It doesn’t matter what brand you own.
While some mowers are built with stronger materials, bigger filters, better engines, and tougher spindle housings, they are all going to break down and cause issues at some time. Some may just not develop problems as quickly as others.
I put together a guide with common things that go wrong on zero-turns. In this guide, you will find a list of causes and solutions for a mower dying, smoking, vibrating, not starting, having cutting issues, and more.
Check out my guide at Common Zero Turn Mower Problems: How to Fix Them
If you still can’t find the solution to your problem or you don’t feel comfortable troubleshooting or repairing your mower, it is best to have an experienced mechanic check out your mower.
You can visit your local dealership that provides repair support for your brand mower. You may also find a lawn mower repair shop with experienced small engine mechanics.